Building the miniature Tidewater Virginia Fireplace (kit 40020) is entertaining. Building it for use in a Christmas morning scene is a lot of fun, especially when you’re just a big kid at heart, like me.
Start with a Tree
By “start with a tree”, I mean that it all started with a Christmas tree. A club I was in was holding a raffle and the top prize was a tiny tree all decorated, including working lights. It was hand made in the US and valued at $100.
The trees from this supplier were beautiful and I was imagining what I would do for a setting for the tree. I had pretty well decided that I would buy one, so I was excited like a kid on Christmas morning when I won it. I set to work on building it a home before it even arrived.
The box is just some foam core board I cut to fit the pretty frame I had. I wanted to go all out for the build, but building a wooden box was going to take too long. Instead of putting the time into the box, I decided to put all of the time into the furnishings. The centerpiece was the tree, but setting it off had to include a fireplace!
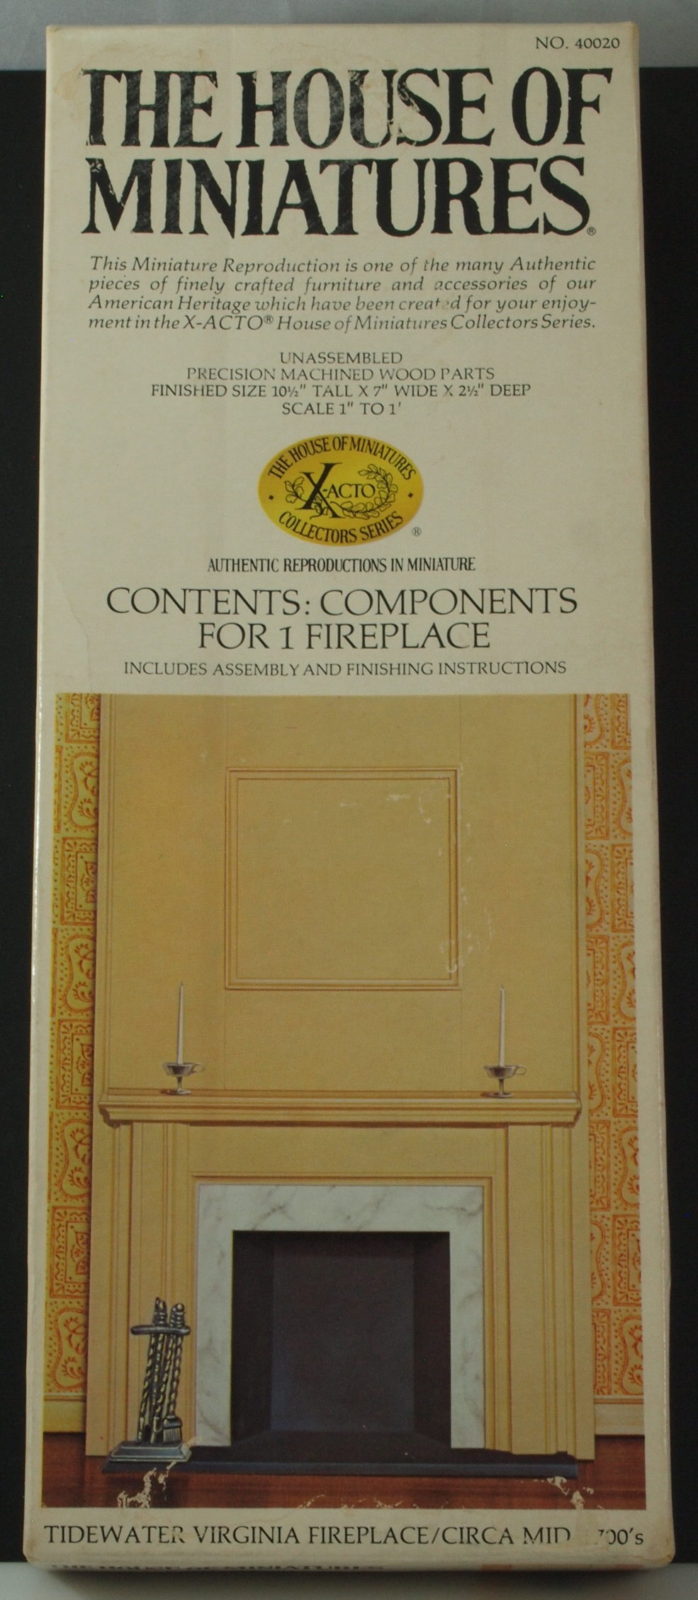
I was itching to build this miniature Tidewater fireplace kit for some time, but I’m glad that I saved it for this room. What would Christmas morning be without a fireplace? Once I had the tree and the frame, I had to scale down the tall fireplace for the setting.
Staring at that trim on the upper wainscot, I remembered some little package tags I had. I’d saved them to use as miniature pictures. Since the proportions of the fireplace would be altered, I decided to also cut down the trim to fit the picture.
Customize
Never be afraid to alter your kits. Just remember the old carpenter’s adage: you need to measure twice and cut once. Then go ahead and cut!
This one turned out fairly differently than the one in the picture on the box. But it is beautiful in the cozy, little room.
This kit has a lot of long, straight pieces, so every cut has to be square and even. That will require some sanding. There are some tricks to keeping things square while sanding, and a sanding jig is a great tool. The one I have is from Micro-Mark and is definitely worth the 20 bucks or so I spent on it.
Gluing Well
With all of these long, straight pieces on the miniature Tidewater fireplace, keeping parts aligned while gluing can be a chore. See my article on clamps and jigs if you want a few pointers.
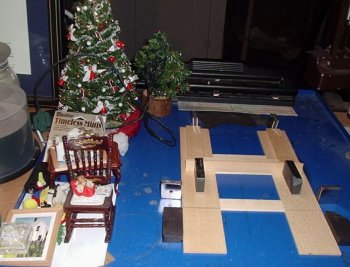
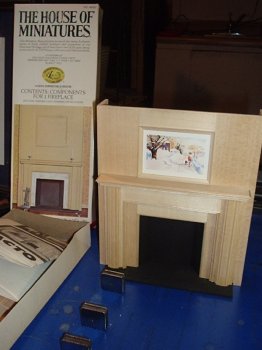
In this image you can see the components I was collecting for the little room along with the first stage of the gluing. I was going to be painting most of the fireplace, so I used a Testors glue without worrying about tinting.
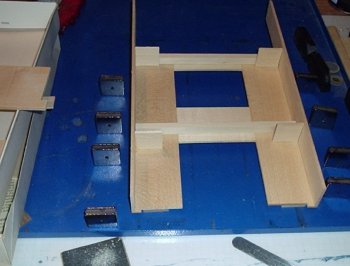
I definitely used a lot of magnets at once on this build. Heavy ones to keep it still. Square ones to keep the sides straight. And extra ones to keep the long pieces from warping. I didn’t quite use all of my magnets, but it was close.
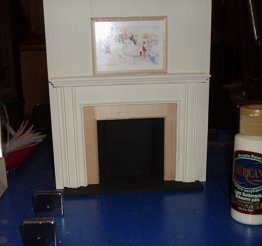
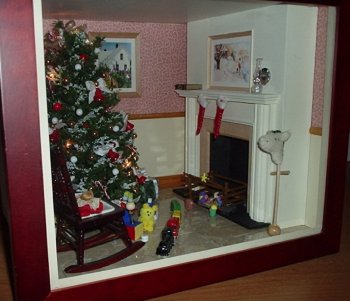
The inside of the fireplace I painted black, as well as the hearth. The surround and picture frame I left natural.
The rich, cream color of the main portions is carried over on the lower part of the walls. That makes it look like the wainscot carries on around the room. I whip-stitched some felt to look like stockings hung on the mantel. My daughter made a little manager scene with toothpicks and some FIMO. She also made a little mug and a plate of cookies to put on the mantel.
Did you make Christmas projects in miniature this year? I’d love to hear about them in the comments!