Here are a few of the kit building essentials that guide all of my builds.
1. Use the Layout Sheet
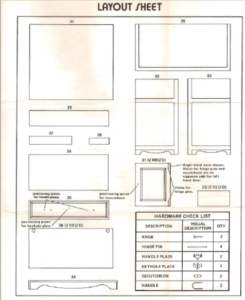
Each kit has a parts layout sheet in the instructions, usually before the assembly instructions begin. It is placed in that location with good reason: so that you will check your parts before you begin your build.
Lay the sheet flat (I sometimes iron mine flat) on your work space and put each part right on the sheet as you sort them. Have four drawer-bottom pieces? Make a stack and count them out. Seem silly? Do it anyway. Here’s why.
This step will accomplish two important things: first, you know if you are missing something. Yes, even sealed kits could have parts missing. Best to know before you start. Second, it helps you to get the right parts as you are building. Laying them out helps to identify them, which is no small chore with a chest-on-chest or a highboy.
2. Test-fit Components
In general, The House of Miniatures kits fit and align very well right out of the box, but I like to lightly sand all of the pieces, plus the butt ends, and test fit everything so that I know where my challenges lie before I meet them. You never know when something has been stored in a damp place or, for open boxes, been damaged. Find out before you open your bottle of glue.
Before you apply any glue, make sure that your pieces fit together well and figure out if you will need to use clamps or a squaring jig to hold the joint tight while it dries. Nothing kills your enjoyment so fast as things that don’t fit right, especially when you have glue drying in a joint!
3. Add Details
Make Your Kit Builds Pop
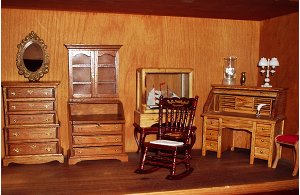
I’ve seen a lot of The House of Miniatures kits built and on display. For your first few builds you’re satisfied if your built piece looks nearly as nice as the picture on the box. Once you’ve learned to replicate the standard build you’ll realize that they all start looking the same. Find your own flair.
You may paint a chest-on-chest instead of staining it, or do a “kit bash” where you combine parts from two or more kits to make something new (or wind up with a Frankenstein monster, but I digress).
Somewhere along the way you’ll get the desire to improve the level of detail. I’ve changed fabric on chairs (silk from old ties works great!), painted little scenes and patterns on slant front desks, upgraded hardware to working bales, and even attempted to “japan” a tea table with black lacquer and gold paint. But my favorite upgrade is reshaping the wood.
If you want to try a little carving, the kit wood is fairly easy to work with. The trick is to:
- get the picture in your head
- commit the design to paper, and then
- figure out how to model that concept in 3D
Keep Your Eye on the Ball
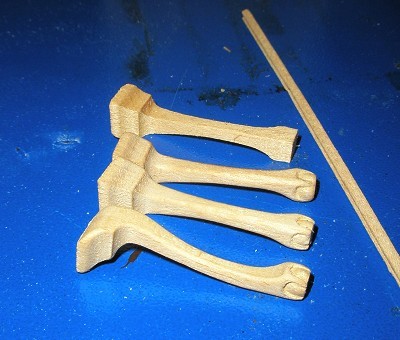
One of my favorite details to add to Chippendale kits is carved feet on their tiny legs. The Ball and Claw fascinates people, and it turns out that there is a simple trick that will make you a passable mini woodcarver of this feature: “Keep your eye on the ball.”
If you can keep the ball well-defined in your mind’s eye, as well as in the pattern, you will find that the claws are the easy part. The wood isn’t really hard enough to make well-defined talons, but if you can make a smooth, rounded ball you will have carried off the illusion fairly well.
X-Acto blades, needle files, and folded scraps of sandpaper are the only tools you really need. Tiny chisels or a Dremel tool with engraving bits are harder to use, but can give better results once you master them.
What are your basic kit building essentials?
These are just a few of the basics that I try to follow with every build. They enhance my enjoyment and my results. Do you have any simple tips that you use when building? I’d love to hear about them. Please share in the comments below or over on the THoM Facebook page.
2 comments
Comments are closed.